Please visit our new TrackAbout Knowledge Base at https://supportkb.trackabout.com for the most-up-to-date documentation on TrackAbout and TrackAbout Mobile.
Troubleshooting Mobile Printers
Bluetooth Pairing
When pairing, try to assign a COM port and use the same on all your devices. It is easier to remember an maintain. We recommend using COM 5 or COM9.
Bluetooth Pairing with MC65
Youtube Video: Pairing Motorola MC65 With an O'Neill Printer
This video gives step by step instructions on pairing a Motorola MC65 with an O'Neill MicroFlash 2te printer. These steps also apply to O'Neill's MicroFlash 8i and Microflash 4T printers.
Bluetooth Pairing with Windows Mobile Embedded
See section 10 (page 10-1) of the Honeywell Dolphin 7800 Owner's Manual. It should apply to most Windows Mobile embedded.
Configuring Printers in TAMobile 6
Follow these steps:
- Start and login in TAMobile 6
- Select Utilities
- Select Config and configure as stated below:
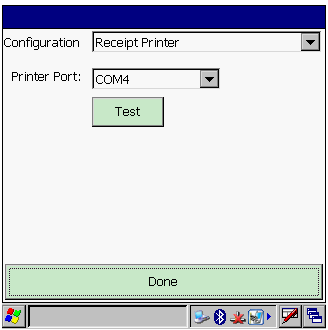
- In Configuration, select Receipt Printer
- Printer Model ONeil mf4T/4TCR
- Printer Port: select the COM port you assigned when pairing the printer with the device (see section above)
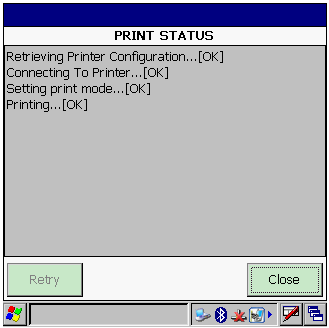
- Tap the Test button, you should then see the result as below:
Retrieving Printer Configuration...OK
Connecting To Printer...OK
Printing...OK
If you an error is reported, check the pairing and ports as well the the pairing and retry.
Full details about pairing a TAMobile6 handheld with an O'Neil Bluetooth printer can be found here.
Pairing the Toshiba EP4DL Printer (4 inch)
TrackAbout supports printing delivery receipts using the Toshiba EP4 printer. To print, TAMobile6 needs to be configured to connect to the printer. There are other ways to connect the printer, but following the below instructions will ensure that TAMobile6 can communicate with the printer and has configured the printer for use by TAMobile6.
- Ensure “Receipt Printer Type” is set to “Toshiba4Inch” and the device has been synced recently.
- Open TAMobile6 and log in.
- Tap “UTILITIES”.
- Tap “CONFIG”.
- Select “Receipt Printer” from the “Configuration” drop down.
- Select a COM Port from the “Printer Port” drop down.
- Tap “Test”.
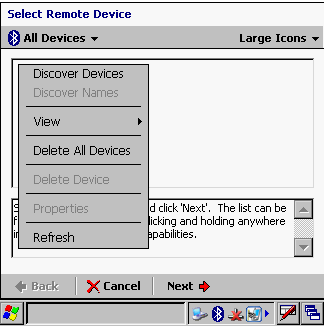
- The “PRINT STATUS” dialog will display. When it gets to the part where it connects to the printer, the device will show a dialog asking you to connect to the printer. It should list the printers available via bluetooth. If the correct printer does not show up, ensure the printer is turned on and long press on the screen and tab “Discover Devices”.
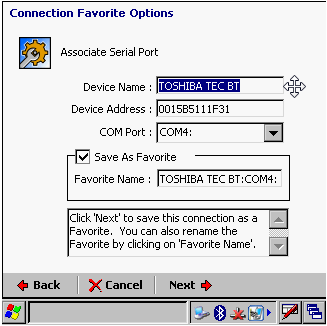
- Once the device shows up, select it and tap “Next”.
- The device will save the printer as a new connection. The defaults should be fine, but ensure the “COM Port” selected is the same you chose in step 5. Tap “Next”.
- Tap “Connect”.
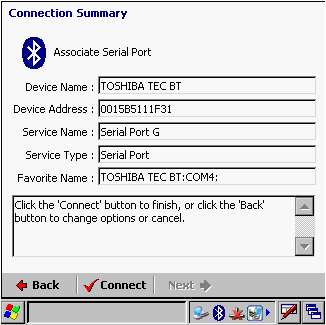
- The “PRINT STATUS” dialog will continue and the printer will print a test page.
- Tap “Close”, then “Done”, then “Back” to get back to the main roles screen.
- That’s it! The printer is now ready to be used to print delivery tickets.


